Chasing tuition is the least favorite job in most tutoring centers. Parents mean to pay, then forget; a bank transfer arrives without the student's name; someone pays twice. Letting parents pay by card from a link fixes most of this. This article explains how to set up online tuition payments with your own Stripe account, so the money goes straight to you, and how to keep offline payments, reminders and records in one place.
Why use your own Stripe account
There are two common ways to take card payments for tuition. Some platforms collect the money for you and pay it out later, minus their fee. The other way is to connect your own payment account, so each payment lands in your Stripe balance under your own agreement with Stripe. With your own account:
- the money is yours from the moment the parent pays, and payouts follow your Stripe schedule;
- card fees are Stripe's standard fees for your country (see stripe.com/pricing), with no platform fee on top;
- refunds, disputes and tax documents stay in your Stripe dashboard, where your accountant expects them.
The cost is a little setup: you need an activated Stripe account and you create one API key.
Before you switch on card payments
- Send one clear amount per family. Monthly invoices with a due date work better than "pay per lesson" messages. Parents should always be able to see what they owe and why.
- Keep offline options. Some families will always pay by bank transfer or cash. Publish exact instructions (account details, what to put in the memo, front-desk hours) next to the card option instead of answering the same question by phone.
- Decide your reminder rhythm. A friendly weekly reminder that includes the payment link works better than one strongly worded message after the due date.
- Agree on refunds. Write down when you refund and how (to the card, or as credit for next month), and put it in your terms.
Create a restricted key in Stripe
A restricted key lets another system do only what you allow. It is safer than pasting your full secret key anywhere: if it ever leaks, it can only do what its permissions allow. For tuition payments, the key needs exactly two permissions:
| Stripe resource | Permission | Why |
|---|---|---|
| Checkout Sessions | Write | Create the Stripe-hosted payment page for the amount due. Card details are typed on Stripe's page, not on yours. |
| Webhook Endpoints | Write | Register the address Stripe notifies when a payment succeeds, fails, is refunded or is disputed. |
Leave every other resource at None. In the Stripe dashboard, this is under Developers > API keys > Create restricted key. The key starts with rk_live_ (or rk_test_ in test mode).
How it works in ClassQR
Online tuition payments are on the Standard and Pro plans. ClassQR never holds tuition and takes no fee: it creates the Stripe Checkout page on your account and records the payment when Stripe confirms it.
- Connect Stripe. As the center owner, open Settings > Payment methods. Under Payment gateways, click Connect next to Stripe, follow the three steps on screen, paste the
rk_key and click Connect. A full secret key is refused. ClassQR registers the webhook on your account for you.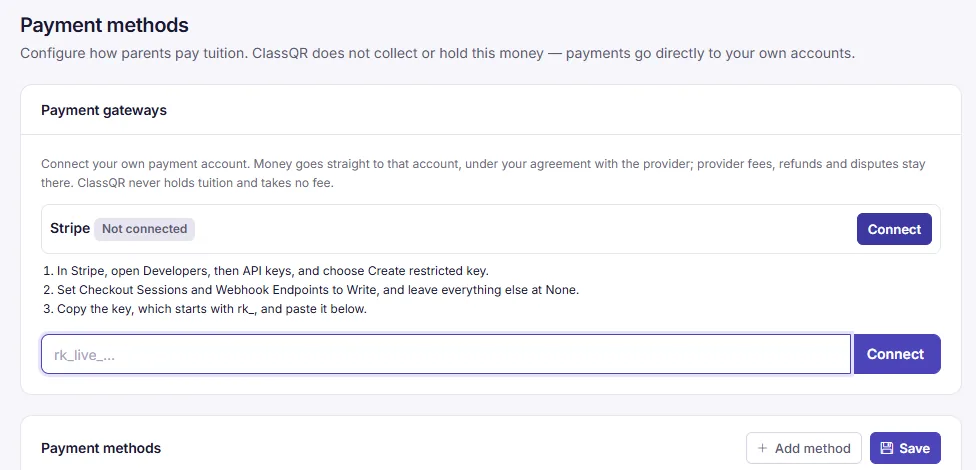
The connect steps, shown in the app.
- Test it first. Paste a test key (
rk_test_) to try the whole flow. Parents see a test-mode notice, nothing is recorded, and the Tuition page confirms the connection works. Replace it with the live key when you are ready. - Add your offline methods. On the same page, Add method takes a bank transfer, cash at the office, a QR code image, a payment link or anything else, each with the instructions parents should follow.
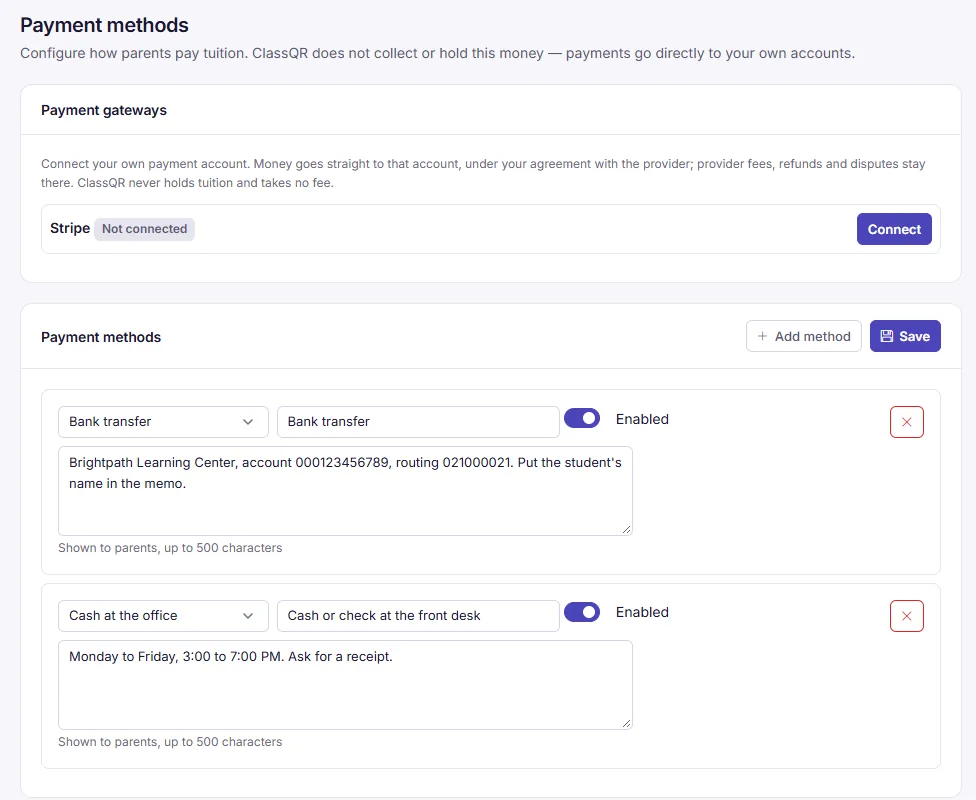
Offline methods with exact instructions for parents.
What the parent sees
Every student has a private payment page that opens without signing in. It shows the amount due and, once Stripe is connected, a Pay online button that opens Stripe Checkout. Parents can pay part of the balance online, but never more than is due. Below it are your other ways to pay and an I have paid form for payments made outside Stripe.
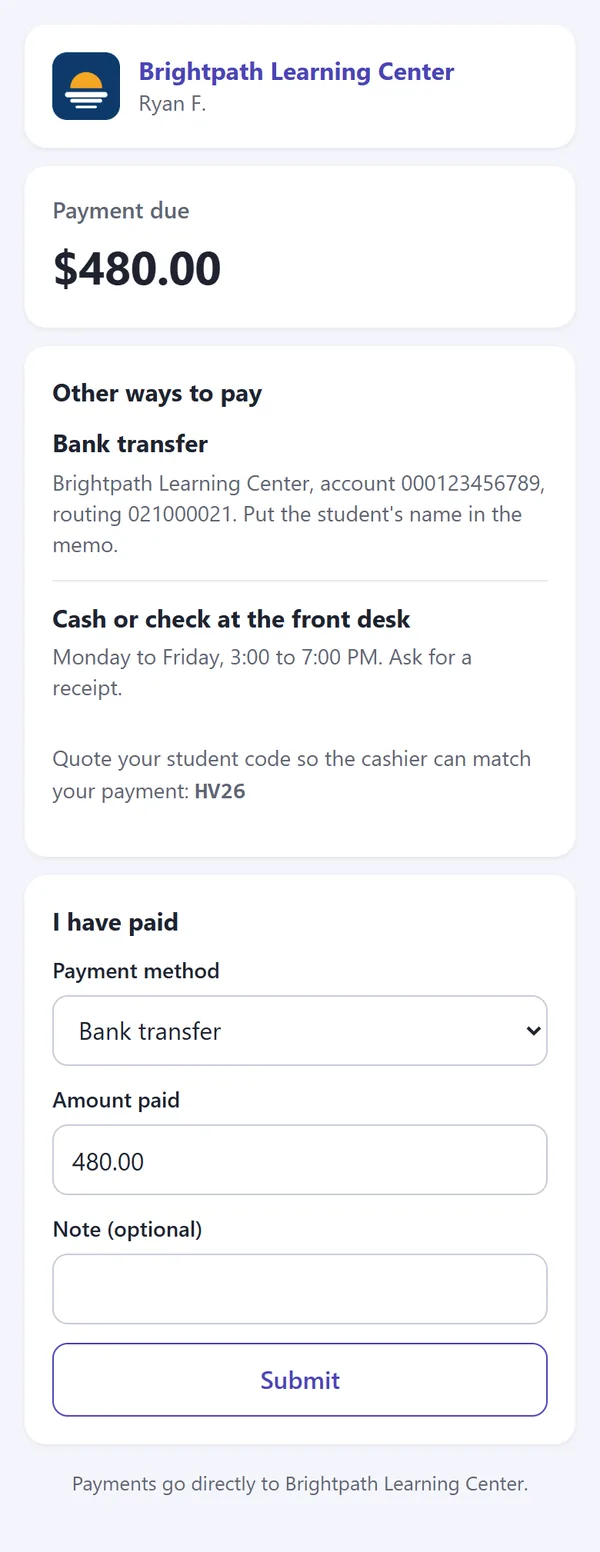
The parent's payment page of a demo center without Stripe connected: other ways to pay and the I have paid form. With Stripe connected, Pay online appears above them.
What happens after a payment
- Card payments record themselves. When Stripe confirms the payment, ClassQR records it as an online gateway payment and sends a receipt. Nobody has to match bank lines.
- Offline payments are confirmed by staff. An I have paid claim appears under Payment claims on the Tuition page; owners, managers and cashiers get an email. Confirm records the payment and sends a receipt; Reject needs a reason.
- Refunds and disputes are flagged, not guessed. Refunds, disputes and failed bank payments from Stripe are listed under Needs attention on the Tuition page. Your ledger does not change by itself: handle it, record any correction, then mark it as handled.
- Reminders go out weekly. On Standard and Pro, every student with an outstanding balance is reminded once a week with the amount, your payment methods and the payment link.
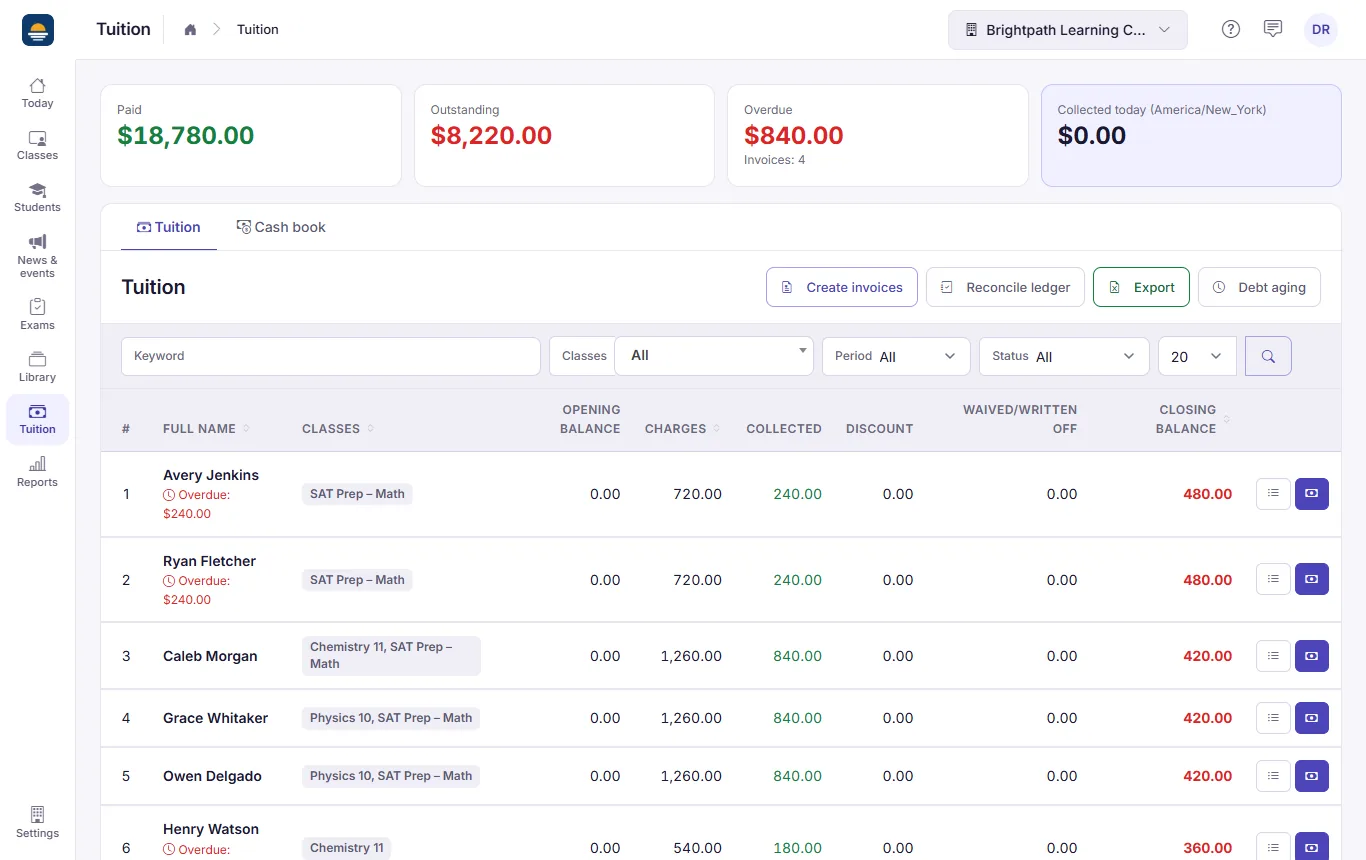
The Tuition page: totals at the top, one ledger line per student.
For setting up tuition plans and invoices in the first place, see Tracking tuition and sending automatic weekly reports.