Some ideas are hard to see on a slide: how the period of a pendulum changes (or doesn't) with its mass, where the image forms as an object moves toward a lens, what happens to a circuit when one bulb is removed. A simulation lets students change one thing and watch the result straight away. This article covers when a simulation is worth the class time, how to prepare one, and how to put it into a lesson so students can open it in class and again at home.
When a simulation is worth it
- The thing you teach changes. Motion, rates, growth, equilibrium, anything with a graph over time. A still picture shows one moment; a simulation shows the change.
- Students hold a wrong idea you can test. "Heavier pendulums swing faster" is easy to believe and easy to check. Ask for a prediction first, then let the simulation settle it.
- The real lab is not possible. No equipment, not enough time, or it is unsafe or too expensive to repeat. A simulation is not a full replacement for a lab, but it lets every student run the experiment several times.
If the idea is a definition or a fact to remember, a simulation usually adds time without adding understanding. Use it where students have something to find out.
Prepare it before class
- Pick one question. "Does the mass change the period?" works better than "explore the pendulum". Students who know what they are looking for stay on task.
- Set the starting values. In Simulic, open the simulation, set the values you want students to start from, then open Share and create a class link. Each link keeps the language and the settings you chose, and students open it without an account.
- Try it on a student device. Open the link on a phone or a school laptop once, so the first time it loads is not in front of the class.
Put it in a ClassQR lesson
A lesson in ClassQR holds everything students need for one topic: slides, documents, videos, quizzes and simulations, in the order you teach them. Students open the same lesson in class and later on their own, so the simulation is still there when they review.
From Simulic, in a few clicks
- Click ClassQR on the share page. Under your class link, Share with your class has a ClassQR button next to Google Classroom and Microsoft Teams.

The share buttons under a class link on simulic.com.
- Sign in, or create a free account. ClassQR says which simulation you are adding. A new account starts on I teach on my own, which is free for up to 40 students; choose I run a center or school instead if you need staff, tuition and a center website. Either way you come straight back to the simulation.
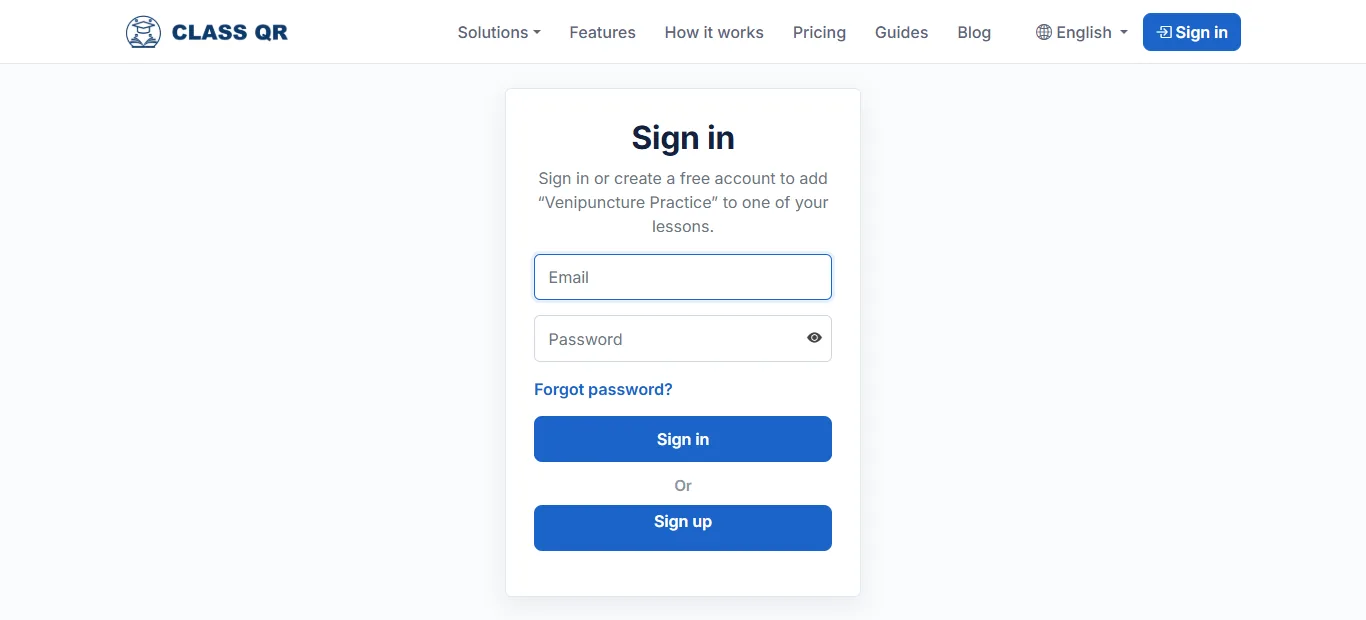
Signing in from the ClassQR button: the page names the simulation you are adding.
- Choose the class and the lesson. Pick an existing lesson or Create a new lesson and give it a name. You can also change the title students will see. If you have no class yet, ClassQR asks you to create one and then brings you back here.
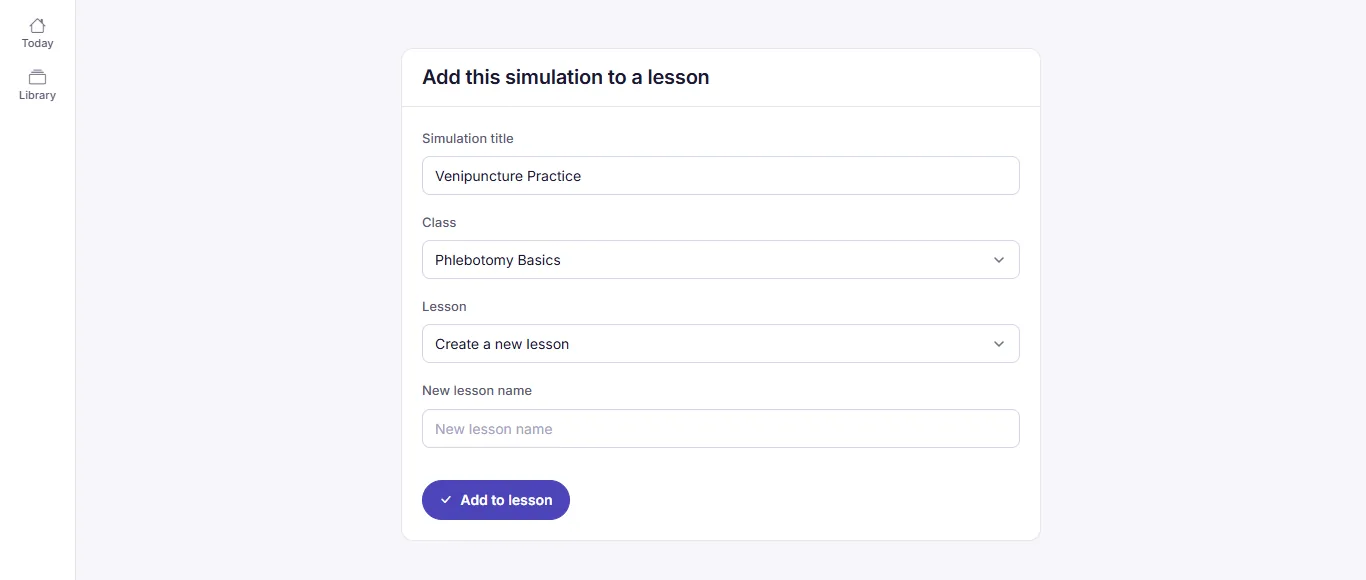
Choosing where the simulation goes.
- Click Add to lesson. The class opens on its Content tab with the simulation at the end of the lesson. It is set for both class time and self-study; edit the item to change that.
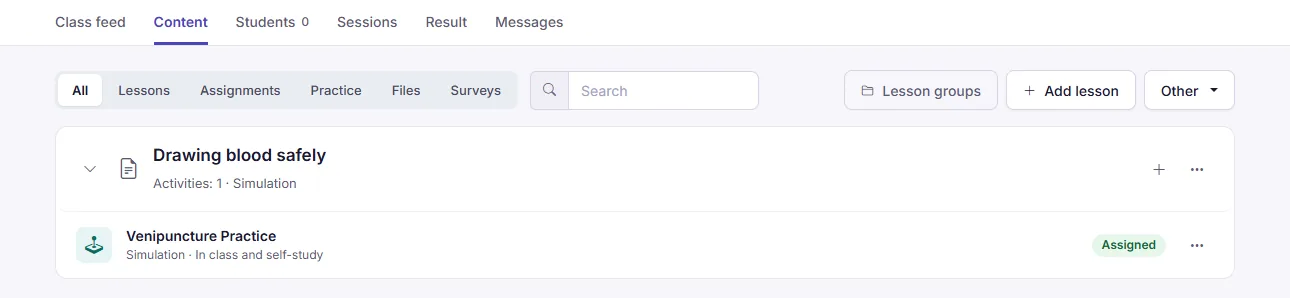
The simulation in its lesson, assigned to the class.
Students open it from the lesson like any other item. It runs inside ClassQR, and they do not need a Simulic account.
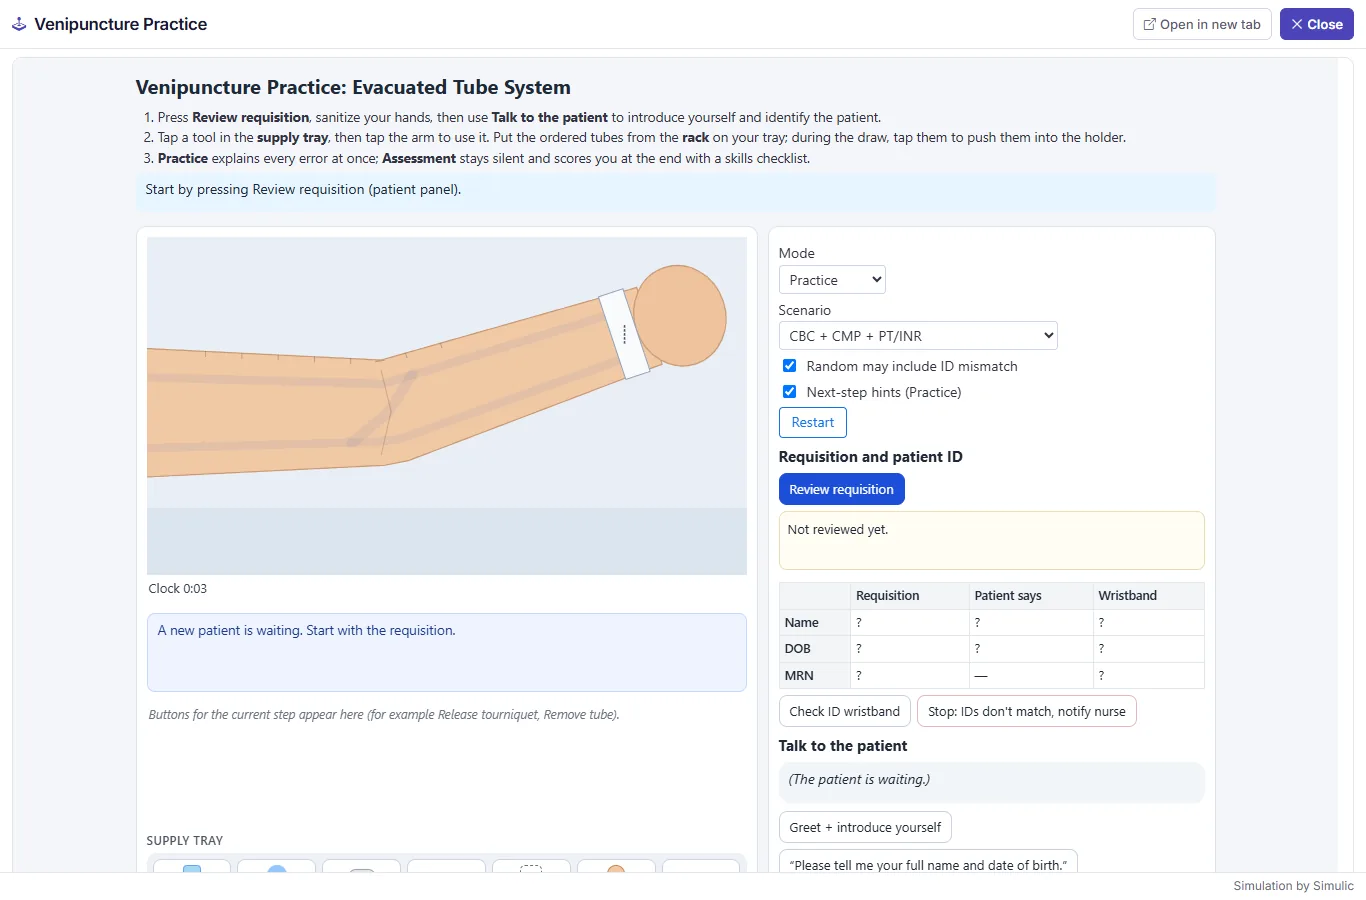
The simulation open in the lesson.
From inside a lesson
Already in ClassQR? Click + on a lesson and choose Simulation. From the library lets you browse and pick a simulation without leaving ClassQR. From a share link takes a play or embed link you copied from simulic.com, which is the way to add a simulation you made yourself or a class link with your own settings.
Use it in class
- Predict, then run. Ask every student to write a prediction before anyone touches the simulation. The surprise when a prediction fails is what makes the idea stick.
- Change one thing at a time. Tell students which value to vary and which to keep fixed, and ask for a short table of results rather than a description.
- End with a question it did not answer. A short quiz question after the simulation shows who got the idea, and the same lesson keeps the simulation for anyone who needs another look at home.
New to ClassQR? Create a free account and add your first simulation to a lesson today.